Glowing, radiant health is the new black. Our Green Table is serving it up, for the whole body! Healthy recipes and tips, the latest on eco-friendly food and "skin food"products and a head's up on ingredient safety are all woven into family-centered stories and discoveries. Bring informed, aware and empowered looks good on everyone!


Abrazos! xox Penny


Showing posts with label sweets. Show all posts

Friday, November 16, 2012

On a roll

Yesterday the grocery store had leftover pumpkins for 99 cents and it got me started on a roll. A pumpkin roll. I love pumpkins in general, especially the heirloom varieties. Each one has such unique features. So expressive and just beautiful! One of my favorite paintings is of a lovely pumpkin patch at sunrise and I have a collection of pumpkins, real and not-so-real, around pretty much all year. I am seriously into pumpkins!

I am packing up a small box with some goodies for my family to have on Thanksgiving. While they love my pumpkin pie most of all, these cookies are de-lish and travel much, much better! They are simple, very light and tender but not overly sweet...just a heads up. Monday I will share a savory pumpkin dish that looks just perfect for Thanksgiving!


Pumpkin Chocolate Chip Drops

2 cups organic all purpose flour
1 teaspoon baking powder
1/2 teaspoon baking soda
1/2 teaspoon salt
1 cup unsalted, organic butter, softened
1 cup sugar (I sometimes use brown)
1 farm fresh egg
1 teaspoon pure vanilla
1 cup pumpkin purée ( If you are using canned pumpkin and have leftovers, try adding it into that morning smoothie!)
2 cups dark chocolate chips

In bowl of mixer, blend butter and sugar until light and fluffy. Add egg and vanilla and mix for a few seconds. Then add pumpkin purée and blend well.

In a separate bowl, mix together flour, salt, baking powder and baking soda. Add to butter mixture and blend thoroughly. Fold in chocolate chips, cover dough in bowl with wrap or foil and refrigerate at least 2 hours.

Preheat oven to 350 and line a baking sheet with parchment paper. Scoop dough by tablespoons and place about 2 inches apart. For my oven, here are the baking times: at 7 minutes I rotate the baking sheet and bake for 6-8 more minutes or until golden. Your oven may vary a little but you can tell they are done when edges start to turn golden brown. Let cool about 8 minutes on sheet and then put on rack and cool thoroughly.
Makes 3 1/2 dozen.

These are really great with a glass of homemade almond milk, tea or coffee and a couple of just-baked ginger snaps thrown in for good measure.


P.S. If I could give these in person, I would fill up and doll up this mason jar...

But for shipping, "repurposing" this plastic arugula container works great! Happy weekend!

Friday, May 11, 2012

Someone else can take the cake...

I'll have the PIE!

I love pie. Really love it. Good pie that is. So much so that on a family vacation years ago, when we arrived at our hotel, right there in the lobby, I spotted a revolving case full of the most gorgeous pies I had ever seen and I thought..oh my, I am in paradise!

As well as eating them, I also loved making them. When we were in Mexico, I even had a small pie business featuring 4 or 5 of my family favorites. It was lots of delicious fun.

Imagine my delight last weekend at our local farmers' market, Hillcrest Farmers Market, when I locked eyes on this...


a vintage-y looking pie cart loaded with all kinds of pies...whole pies, pie slices, mini pies, little pies baked in cute little Mason jars. Drool! 


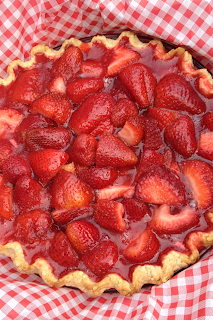
Fresh Strawberry Heaven!


Mini Pies, Cute-as-a-Button Jar Pies...pies, pies, pies, oh my!

Then, I learned all these beautiful pies were made with family recipes, local ingredients and baked in energy-saving, recycle-perfect glass pie plates and jars. (You can turn down your oven 25 degrees when baking in glass!) These are the very eco-friendly, super delicious pies I dream of serving right here on Our Green Table. Every bite fits all Our Golden-Green Rules (on sidebar)! More drool!


Fresh local strawberries piled sky high over a white chocolate glazed crust...a slice of cloud nine!

Pie Wizardess Leah sells her Pie in the Sky pies at several local spots and also has a great website, www.pieintheskylr.com where you can check out her whole sky full of pies and where her luscious cart will be heading. I will be getting my pie fix following her to the Quapaw Quarter Home Tour on Sunday. Maybe I will see you there...just don't try to cut in front of me in line!


Just in case you are eager to whip up a little of your own heavenly magic, here is a recipe from Leah! Have a great weekend! xox

Brownie Nutella Mini Pies

Brownie mixture:
1 cup sugar
2 eggs (get yours from a local source!)
1 tsp. vanilla
1/2 tsp. salt
1 stick or 1/2 cup unsalted butter
2 squares unsweentend baker's chocolate
1/4 tsp. instant coffee (not regular coffee grounds!)
1/4 cup flour
small jar of nutella
1 cup whole almonds - toasted and coarsely chopped

Melt the chopped chocolate and butter in a double boiler. Add salt and instant coffee. When melted, let cool away from heat while mixing sugar, eggs, and vanilla in large mixing bowl. Add chocolate mixture to bowl and mix very well. Finally, add flour and mix just until blended.
For the mini pies, use a homemade or store-bought refrigerated pie crust, and cut into 4-inch rounds. Line 12 ungreased muffin tins with the rounds allowing a small edge to hang over each muffin cup. Fill each crust-lined muffin tin 2/3 full with brownie mixture and bake 350 for 30-35 minutes or until muffin edges are slightly browned and brownie center are puffed. Let cool completely on wire racks.

When brownie pies are cool, the centers will sink to form a small indention. If this doesn't happen to all the brownie pies, you can create a small indention or hole with your finger or the end of a wooden spoon. Fill the indention on each pie with 1 Tbsp of Nutella. Top with chopped almonds. Enjoy! Will keep in airtight container for 1 week.


Monday, January 30, 2012

Chipmunks among us...

See these cheeks? Look exactly like my pockets...just jammed full with cards, phone numbers, flyers. Oh my…if only I could pool them all and open up a lifestyle store!!


Behind every piece of help I have stuffed in my pockets, I have gotten an equal amount just talking with the store owners and staff. So engaged and so excited about sharing what they know. Really...it has been amazing. Most of the great places I have dropped in on walks have led me to another. The concept of neighborhood is remarkable. “Oh, I don’t have that but I know someone who does…here is the phone number. Need directions?” Again…a perfect fit for my Share Our Strengths philosophy.


I am also in awe of the many, many instances where I have ended up in a store that only deals in cash and what happens next. Who knew? It happened with Sue and her dry cleaning store, with the shoe repair store, the coffee shop and again this morning. I walked to the bodega on the corner. Their debit card machine was down. The owner smiled reassuringly, packed up my goodies, handed them to me and said, “Just drop by whenever you can and pay me then.” Astounding. I had only been in that store one other time.

A couple of weeks ago, a study came out on longevity and New Yorkers are found to live on average two years longer than the rest of us. I think this somewhat surprising sense of neighborliness contributes to that statistic. Also, all the walking, of course. Rarely is there an overweight person. Even with the astoundingly de-lish bread and baked goods here. My these folks can bake.

Yesterday we had to go back to the hospital for a bit and to sweeten the trip, dropped by for a delectable cookie. Amazing what problem solvers really good cookies are! Here is a gorgeous picture and the recipe for One Girl Cookies' wonderful orange coconut drop cookies...just in case someone in your neighborhood drops on by.


Orange Butter Drops with Shredded Coconut (OGC)

3/4 cup granulated sugar
Grated zest of one orange
2 ½ cups AP flour
½ teaspoon kosher salt
1 cup unsalted butter, cold, cut into pieces
1 teaspoon vanilla
3 tablespoons cream cheese, room temperature
2 tablespoons fresh oj
1 cup 4x sugar
½ cup unsweetened shredded coconut

Preheat oven to 350. Put granulated sugar and orange zest in a medium bowl. Using both hands, rub the sugar into the orange zest. Put the mixture in the bowl of an electric mixer fitted with a paddle attachment, and add flour and salt. Mix on low speed for 30 seconds.

With the mixer running on low speed, gradually add the pieces of butter. When the mixture begins to look like crumbs, add the vanilla. Gradually add 2 tablespoons of the cream cheese. When the dough starts to clump together, turn it out onto a lightly floured work surface. Knead it by hand for a few seconds until it is fully combined.

Scoop out a small round of dough, about 1 ½ tablespoons in size. Roll the scoop onto a ball. Place on parchment paper-lined baking sheet and gently press the ball. Repeat. leaving 1 inch between cookies. Bake for 14-16 minutes or until golden around the edges. Cool on a rack.

Prepare the glaze: In a clean bowl of an electric mixer fitted with the paddle attachment, combine the remaining 1 tablespoon cream cheese, the oj and confectioner’s sugar.. Mix on low speed for 30 seconds. Increase the speed to medium and mix for 2 more minutes. Glaze should be as thick as glue!! Spread coconut on plate. Dip the top of each cookie into the glaze, dip into the shredded coconut, and let set for 20 minutes. Makes 36.

Look...there is even a "namesake" cookie!!


Friday, July 15, 2011

Icing it down

My son sent me a link about "awesomeness"...thought it was right up my alley. It is. I love it and love finding it in the world.


I love stories about personal "empowerment"...how one person took her/his passion, added a lot of persistence and pluck and got the "dream" out of the clouds and into real life. That is one of the reasons I promote the personal care line I do here, aside from the fact it is luscious and without harmful chemicals, it is also the story of one young woman, one dream...awesomeness. Love it.

Now, imagine this...it is 103 in the shade and here comes a story about one woman, one dream and ice cream!!! And, this particular gal is from Ohio, too...my birthplace! Why...sheer delight! How could there be a more fitting story for this sultry Friday? While I lived in Cleveland, there was an "old-fashioned" ice cream store, The Penguin. Oh my...the flavors...simple but robust...no nonsense coffee, butter pecan, mint chocolate chip, lemon, blackberry...all custard-based and hand-cranked. Just delicious. Can still taste them.


Here is the cookbook that caught my eye and once I read the story about Jeni...I was hooked. I guess she has been on several daytime shows recently. I have only watched Rachel Ray once, when one of my son's partners was on, and so I had never heard of her. What a story!!!!!! And, as legendary as her tale is, her ice creams are legends of their own. So fun. So awesome. Icing on the cake for this Friday. 

Here is a great sounding recipe...perfect for July...that mixes up watermelon and lemonade! For more on Jeni, check out her fun website ice cream and OMG...you can even order online!!!


Watermelon and Lemonade Sorbet (Jeni Britton Bauer)

1 small to medium watermelon
1/2 cup lemon juice (from 2-3 lemons)
1/2 cup sugar
1/4 cup light corn syrup

Prep: Cut enough watermelon flesh into 2-inch cubes to make about 4 cups. Puree melon in a food processor. Measure out 2 1/2 cups of puree and transfer to a medium bowl. Reserve the rest of the watermelon for another use (Penny's note: how about tossing in a shake or freezing into ice cubes?) Measure out the remaining ingredients. Fill a large bowl with ice and water.

Cook: Combine the lemon juice, sugar and corn syrup in a small saucepan and bring to a boil, stirring to dissolve the sugar. Remove from heat.

Chill: Whisk the lemon syrup into pureed watermelon. Pour mixture into a 1 gallon Ziploc freezer bag and submerge the sealed bag in the ice bath. Let stand, adding more ice as necessary, until cold, about 30 minutes.

Freeze:  Pour the sorbet base into the frozen canister of an ice cream maker and spin just until it is the consistency of very softly whipped cream. Pack into a storage container, adding a few watermelon seeds if you wish. Press a sheet of parchment paper directly onto the surface of the sorbet and seal with an airtight lid. Freeze until firm in your freezer, about 4 hours. Makes 1 quart.

Monday, July 11, 2011

Berry Chilled


A picture is worth a thousands words. Holy cow and I hear we are headed for lots more of the same hideous heat!! And so, yesterday, when my mom reminded me that Williams-Sonoma was having a free ice cream class, I hot-footed it up there to meet a pal. Such a sweet, cool, blissful hour!

I am a scratch cook and used to make ice cream from scratch as well. My, how things have changed!! I do not have a lot of sophisticated kitchen equipment, except my new turbo-charged blender. Just the basics, most of which are 40-60 plus years old, including an "old-fashioned"...geez...hand-cranked ice cream maker. You know, the ones you pack in layers of ice and salt and crank for quite awhile to get the frozen goods? One guest there said he had heard of those. I guess the proper term for them is now "vintage" or perhaps "antique". The little beauties they have to make ice cream now are amazing. Just no paddle to lick, which was half the fun.


Anyway, I wanted to share some tips. Ice pops can be made from any juice...less sugar-y, the better and layered with a combination of juices if you like. You can swirl in berries, yogurt, little bits of fresh fruit. I feel sure you could still use little paper cups for freezing instread of the molds.(See note below). Here is a simple taste treat I learned...freeze chai tea and use a cinnamon stick as the popsicle stick. Insert it when the ice-y mixture is set enough to support the stick, but not frozen solid yet. Oh yum...sounds de-lish.

Pretty fancy ice pop* (from Internet)...love the orange drip catcher!

Here is a recipe from Heidi Swanson for Berry Ice Pops. You can use any frozen berry or fruit, organic berries are a must. Do use high quality, organic, full-fat yogurt for these to have the best mouth feel, taste and health value. Siggi's from Iceland seems the perfect choice! If you are not a dairy eater, do try some of the non-dairy yogurts. If you have kiddos, these are ideal to make and keep everyone away from those overly sweet, full-of-dye, chemically-enriched, commercial pops. Feel free to add a little honey to sweeten to taste.


Berry Ice Pops

Puree 7-8 ounces frozen berries. Add one cup of yogurt and mix well. Taste. Add honey (or even real maple syrup) to taste. Use remaining 2 1/2 cups of yogurt (maybe add a dash of vanilla or honey) to fill 8 4-ounce molds* or paper cups 2/3's full. Top with berry mixture and swirl just enough to create a pretty pattern. Freeze. Makes 8 4-ounce ice pops.

*Note: with all the concern about plastics, I would be very sure that if you opt for those cute plastic ice pop molds, ask if they are BPA-free. It should be in writing on the pop's packaging, too. Otherwise, avoid them, especially if you are pregnant or giving these to little ones. "Cute" could be very costly to your health!!

Friday, July 1, 2011

Spilling the Beans

It is the Fourth of July weekend and we will have four "kiddos" home. Oh, beautiful for spacious skies have opened up and delivered two sweeties, two more are on their way!

A real cause for sparkles and celebration!


Here is some of the food we will be having...spilling the beautiful beans on our holiday fare.

For amber waves of grain, I made up San Miguel Granola, the one we had at that magical B and B in Mexico. It is really different from my Natural State Granola and a fun taste change.


For purple mountain majesties, I will be making the Blackberry Cake from last year.


For above the fruited plain, we will be having a coconut, mango, bean and brown rice dish made with gorgeous heirloom beans, soaking away as I write this...

and a wonderful Wheat and Snow Pea Salad.

Also, a Gingered Fruit Bowl and this amazing Nopales and Tomato Salad (Gracias a ti, Victoria!)
and Stuffed Portabellas.

I also plan to make up this recipe I got yesterday, from my pal Dr. Barnard.

Mango Lime Sorbet

2 cups pureed partially frozen mango
1/2 cup agave nectar
Juice of 2 limes

This recipe works best if the mango is frozen, and then allowed to thaw for about 15 minutes. Once it has partially thawed, puree the mango along with the agave and lime juice. Pour the puree into a shallow glass or metal bowl and then place it in the freezer. After 30 minutes, stir the puree, then repeat every 15 minutes thereafter until you are ready to serve.

To make it simpler, use store-bought frozen mango to avoid peeling and deseeding several fresh mangoes. The freezing process accentuates tartness and reduces the sweet flavor. That means the puree should be slightly less tart and slightly sweeter than you expect the final product to be. Serves 6.

For brotherhood, we will be doing lots of hanging out and waving flags and marching in our neighborhood's parade.

and for from sea to shining sea, with the pursuit of health and happiness for ourselves and Mother Earth in mind, we will be declaring our independence and living free from harmful chemicals...all sinks, all showers, all bodies now cared for with liberty and justice for all!!

xoxoxo Have a great weekend! I have a new camera and cannot wait to get snapping!

Monday, June 20, 2011

A Different Kind of Card

Yesterday was Father's Day and I thought about my dad a lot. He has been gone over two years now and it dawned on me that, as an adult, I don't remember ever spending an official Father's Day with him. Having lived almost my married life far away from my own family, Father's Day travel got sacked in lieu of visits later in the summer and in the winter. When his and my mom's health started failing and I began the travel schedule I have now, I still don't remember being there, except the year that Christian and Resh got married. His birthday, yes...a couple of times.


Fortunately, my dad was not the Hallmark kind of guy, nowhere near close to it or close to Ozzie Nelson or that oft-pictured "dad in his glory over the barbeque" for that matter. He was distinct, a bit of a loner.  

While not having an official Father's Day to remember, I do have the memories of lots of "father's days" to savor.


The cards I have from those days are his library card, museum tickets, theater stubs, a napkin from Claudio's were we would sail for oysters, my original skis and ski boots that he and I picked out together, the antics (and gross mishandling of memories on my brother's part, by the way) of my pony days with Topper, being rigged up in the trapeze for a fun (but little scary) and very fast sail in the Fireball, a program from Mashsomack and Long House, his dinghy and oars, a cutting from his pencil cactus, the memory of our winter sunset chase, our canoe adventure on the Peconic Estuary, quiet moments on the beach at Bootleggers Alley. 

Not me obviously but that is the trapeze my dad rigged me up in and how I actually looked under sail, minus the wetsuit.

Gardens at twilight at Long House


I am happy that those memories span 365 days and not just one. Made yesterday a lot easier.

Here is one of Dad's favorite cookies...he loved peanut butter and cookies. Thinking of you, Dad xoxoxo Phutsie


Dad's 'Boo Cookies

1 cup unsalted butter
1 cup brown sugar
1 cup white sugar
1 cup peanut butter (I use organic)
2 cups flour (I sometimes use whole wheat or a combo)
2 teaspoons baking soda
1 teaspoon vanilla
1/2 teaspoon salt
2 eggs
1 tablespoon milk

Cream butter and sugar. Add peanut butter. Add slightly beaten eggs to the creamed butter-sugar-peanut butter mixture. Next, stir in milk. Blend flour, salt and soda and add to creamed mixture. Lastly, fold in vanilla. Roll into balls; smash with a fork (wouldn't be peanut butter cookies without those fork marks!) and bake 325 for 15-20 minutes. Makes about three dozen.  

Note: Yes, that is a lot of sugar. Sometimes I hold out 1/4 cup of the white sugar and roll the dough balls in it or use to sprinkle on hot cookies. I also like cookies slightly underbaked and so if you do, too, check the first batch at about 12 minutes and see how much longer you want to bake them. Cookies continue cooking after you take them out of the oven.  

Thursday, May 5, 2011

They called my name...

Actually...it is Friday, not Thursday!! One of the fun things about Mexico is that I actually got called my real name "Penelope". "Penny" is very difficult for Mexicans to pronounce and so my real name it was. Heaven. As a child of the 50's...along with Betty Crocker and TV dinners, some of us got stuck with "nicknames" and mine stuck like molasses or more appropriate for today's post...sticky caramel.


Anyway, take a look at this gal calling to me. Isn't she divine?!

Much more on Skeletonista La Catrina later! One of the guests staying where I did was from Canada via Romania. She and her husband had won a "lottery" allowing them to emigrate to Canada and they have been travelling ever since. They had also just come from San Miguel and were a little unhappy with Guanajuato. Unlike San Miguel which she described as a "fiesta at every corner", she said Guanajuato was a city obsessed with death. Had to admit that in part she was right...they are kinda stuck on it...

Welcoming "mummy". Guanajuato is famous for its mummies.

Mural by the funicular, an artistic renditon of the Guanajuato cityscape!

Mural of sliver mines where 1,000's died

Descent into the deadly mine

One of the many battles

However, sticking with something isn't all bad. My absolute obsession with Halloween began when we lived in Mexico 30 years ago. That is when I not only started uber-decorating the house, but outfitted the kids and me in costumes. We were ghosts for years. Merrily macabre. So...all this being said...neighbors...beware...I brought home lots of fun twists and twisted fun for Halloween this year. Already working on my costume...

Here is another sticky, sweet twist, one of my favorite desserts, Crepes de Cajeta. The picture is not great but the dessert called my name, especially when the server asked, "Y Sra. Penelope, que quiere?"

Now, given that I am trying to weave in all these wonderful tidbits from Mexico around tons of other things happening, here is also nod to tomorrow, Derby Day. Don a bonnet (La Catrina has on a fab one!) and top these crepes with some spring berries and mint and you will be off and running into a real taste trip!


Crepes de Cajeta

True confession...I have never actually made these, just eaten them. However, this recipe looks muy authentico. You can also find jarred cajeta in Mexican grocery stores. Do not be tempted to use flour tortillas instead of the crepes. They are way too tough and dry. This recipe is from The Food Network...

1 (14ounce) can sweetened condensed milk
1 cup milk
1 large egg
2 large egg yolks
1 teaspoon sugar
1/2 cup all-purpose flour
2 tablespoons unsalted butter, melted
1/4 teaspoon salt
1/2 teaspoon vanilla (real Mexican vanilla would be fab here!)
Pinch ground cloves
Pinch ground cinnamon
1 cup coarsely chopped pecans, toasted (see Note)
2 tablespoons confectioners sugar
1 pint fresh raspberries (or strawberries...not sprayed, please!!)

To make the cajeta: place the unopened can of milk in a heavy saucepan and cover completely with water. Over very low heat, cook at a bare quiver for 3 hours, adding more water as necessary as it evaporates. With an oven glove, turn the can over and cook for 2 1/2 hours more. Cool to room temperature and refrigerate overnight.

In a blender, combine the milk, eggs, sugar, flour, butter, salt, vanilla, cloves, and cinnamon and blend until completely smooth. Let the batter sit in the refrigerator for 1 hour.

Heat a small nonstick skillet and pour in about 2 tablespoons of the crepe batter, swirling the pan immediately to make sure the batter covers the pan evenly. Cook until small bubbles form on the surface, then flip to the other side. Slide onto a plate and make the remaining crepes in the same way, stacking them on the plate until you are finished.

To assemble the crepes: open the can of cooked condensed milk and stir it up from the bottom with a fork, blending to an evenly thick consistency. Spread about 1 tablespoon of the "cajeta evenly over the surface of one crepe. Scatter some of the toasted pecans over the top and roll up into a tube. Repeat with the remaining crepes and reheat in a low oven for a few minutes before serving. Serve 4 crepes per person, sprinkled with a little confectioners sugar and scattered with raspberries or strawberries.

Note: To toast nuts, preheat the oven to 350 degrees. Spread the nuts on a cookie sheet and toast in the oven until golden, about 15 minutes. Set aside to cool.


Wednesday, April 27, 2011

Shoe Fly Pie

Actually, I love that molasses pie. Being from Pennsylvania and all, it is a staple in my memory. But those are actually buzz words...so I remember what I am writing about today. My mind is on overflow and it will take me days to share all that has gone on!


Somewhere between being just a little unnerved and truly unnerved, I take my seat as a passenger on the airplane. You'd never know which state I am in from the looks of me. I have an outward calm. Internally, not so calm. Especially on those three seater airplanes. Airlines should tell people that their full price ticket is buying a seat on a half-airplane!!

On a "normal" flight, my palms sweat a bit. Yesterday, even my feet betrayed my internal state. Sweaty. I flew from Mexico and then out of storm-socked Houston into storm-ravaged Little Rock, rattled more than a little by the weather, a super slow customs and concourses that are longer than should be legal. Forget passenger-friendly. Geez. Did the architect of that monstrosity of an airport ever fly? Ever? With bags? With a connecting flight to catch? Utopia complete with sunny beaches and endless ice cream will have to be the end destination if I am ever to consider flying through Houston again. Ugh. Houston, we have a problem is right.

Anyway...there was some good stuff that happened. I had great plane "mates" full of wonderful, generous human spirit. The gentleman behind me was very upset. He was elderly, disabled and really afraid if something happened that he would be in trouble and create a burden for others. The gal beside me, the two guys in front of me and I assured him that we four would help him, no matter what, and he should sit back and enjoy the flight (!). Once that bond formed, we five turned to other concerns....the cute sandals on my gal -pal's feet.

Aren't those great? Cute as can be. And the price...oh my. Check them
out here  
www.kinosandalfactory.com

That shoe chatter took about 15 minutes. All nervous and afraid silence would enhance our fears, I decided it was my turn to provide some sort of entertaining 15 minute distraction. I remembered I had squirreled away two pieces of fabulous veggie pizza (yes, Mexican style) and announced, "Pizza Party over at 14 A!"  While eating was maybe not the smartest thing, eat we did. Here is what the pizza looked like fresh from the oven. De-lish...


Obviously, we all got home safely and I am so excited to see if my pictures came out so I can share them. As a thank you for being my memory jogger, here is a recipe from Allrecipes.com for honest-to-goodness Shoofly Pie. There are two kinds of Shoofly Pie, one wet and one dry. I am not sure which this is but the picture looks fab...bubbly, butter-y and cinnamon-molasses-y enough to eat! 


Happy Landing Shoofly Pie

1/2 cup molasses
1 teaspoon baking soda
1 cup boiling water
1 pinch salt
1 1/2 cups all-purpose flour
1 cup brown sugar
3/4 cup unsalted butter
1/2 teaspoon ground cinnamon
1 (9 inch) unbaked pie crust


Preheat oven to 375 degrees F. In a medium bowl, dissolve the soda in the molasses and stir until it foams. Sir in the boiling water and pinch of salt. In a separate bowl, mix the flour, cinnamon, brown sugar and butter into crumbs.


Pour 1/3 of the molasses mixture into the unbaked crust. Sprinkle 1/3 of the crumbs over the molasses mixture and continue alternating layers, finishing with the crumbs on top. Bake in preheated oven for 25-30 minutes, or until the crumbs and crust are golden. Don't overbake!

Monday, February 28, 2011

Another peace of cake

This is a little weird. But I am going to do it. Just this once because many of you have asked. I am going to re-run a post from when I first started this blog. My dad passed away two years ago yesterday and I started this blog to "write to myself", I guess, during the difficult period of his illness and all that came afterwards. I also decided to weave the stories and thoughts around recipes. A girl's gotta eat or at least, this girl does. The cake in this post is fabulous. And so, here it is again... 

Let the elephant in the room eat a peace of cake...

There is an elephant in the room that's hungry and so I am going to feed it Carrot Cake.

In my heart, I feel my dad fell and died because of his chemo treatment. There... I said it. Not quite out loud, but I said it. I was with him the day he went to the oncologist and learned that after radiation, his condition had taken two steps back and one forward. He asked what else could be done and chemo was offered, a little hesitantly but still put out there and up for grabs. Without batting an eye or taking a breath, he asked when he should show up. My mom and I were aghast and both blurted out to the doctor, "We'll talk about this and get back to you!" One treatment of chemo six months earlier landed him in the hospital for a week and he was now six months frailer. I got on the phone and called doctor friends, my family and my brother. What should I do...I had three weeks to talk him out of this, but how??? All said...you can't. It is his decision and he feels hopeful.

What I could tell was that Dad was determined to live and fight nature and his disease from taking its course. Stunning in itself given my dad's aversion to pain and to confrontation of any kind. It was obvious to me that he was not ready to die and also that he wanted to fight his battle a little more privately. "You go on home, Babe" and so, after being with him for four weeks, I did, in early February. His doctor said he would receive the mildest dose of chemo. On February 25th, he did. On February 27th, he died. One of the first things I found when I got up there just hours after he died, was a shopping list by his chair for February 28th. And so, he did die hopeful and optimistic that he would go on doing what he loved and I have to deal with the wonder, and the fact, that in a strange way, I am thankful that he went ahead as he chose.

One of the other things I have to deal with is that in over 50 years of cooking (counting those cute little cakes I made in that 1950's toy oven...what were those called...anyone remember??), the first time I ever made Carrot Cake was February 27th. That same night, just two hours before he died, my dad ate his last piece of cake with a scoop of his favorite ice cream. What flavor of cake? He ate Carrot Cake given to him by his bridge partner. And so, there we were, father and daughter, eating the same cake at the same time, half a country away. It is sweet peace indeed.


Here is the cake as I made it. I am working on a gluten-free version and will have it soon! And, it would be simple to make this vegan as well.

Special Carrot Cake (Serves a herd of elephants)

Preheat your oven to 300. In a blender or food processor, combine:
1 cup of vegetable oil (peanut or corn)
1 scant cup local honey, topped off with 2 tablespoons molasses

Add, one at a time:
3 fresh eggs

Sift together:
1 1/3 cup whole wheat flour
1 teaspoon sea salt
1 1/3 teaspoons EACH baking soda, baking powder, cinnamon and just a dash of freshly grated nutmeg

Stir the dry ingredients into the oil-honey mixture and add:
1 teaspoon vanilla

Then, fold in:
2 cups grated carrots (raw)
3/4 cup dark raisins
1/2 cup coarsely chopped walnuts

Transfer batter to an oiled 9 x 13 pan (line with parchment paper if you wish) and bake for about 1 hour or until done (use toothpick test). Serve warm or cool, plain or with ice cream or whipped cream. Also delish with a cream cheese buttercream frosting!

Friday, February 11, 2011

Dream on...

Maybe it's me. But I feel a lot of resistance in the crisp cold air. I went on two glorious walks yesterday and bubbled off to all I passed, "Isn't this fabulous?!!" Instead of wild agreement from everyone I met, I got more than several "It needs to end already" replies. And, the kids...where were they? I didn't see too many out playing. The day before, yes. But yesterday when it was so bright and blue and the snow was still just perfect...only a couple here and there. Oh well,  I love it snowy. It is such a rare treat here.

With the weekend and Valentines' Day coming up and taking into consideration many of you may not be the winter fan that I am, I thought I would calm you with this dessert. It has a warm, languid, tropical vibe...

Coco-Chocolate Fondue

Bananas and mangoes pair deliciously with this simple sauce which could be your Valentine's dessert. Refrigerate leftover sauce for up to a week, then reheat it and serve over toasted slices of banana bread.

1 (15-ounce) can cream of coconut, such as Coco López or Thai Kitchen
6 tablespoons unsweetened cocoa power
1/2 teaspoon pure vanilla extract
1/4 teaspoon sea salt
2 bananas, peeled and cut into 1-inch slices
2 mangoes, peeled and cut into chunks

Combine cream of coconut and cocoa powder in a small, heavy saucepan. Heat over low, whisking, until mixture is warmed through and smooth. Transfer to a fondue pot or a warmed heatproof bowl, stir in vanilla and salt, and serve with bananas and mangoes for dipping. Makes 6 servings.